Metal Laser Engraving: Everything You Need to Know

Metal laser engraving is a cutting-edge technique used to create detailed designs and markings on various materials, including aluminum, stainless steel, and brass. Utilizing the precision of laser technology, this method offers unparalleled accuracy and speed, making it ideal for both artistic applications and industrial uses. Whether you're looking to customize jewelry, create bespoke components, or mark industrial parts for traceability, metal laser engraving provides a durable and efficient solution.
What is Laser Metal Engraving?
Laser metal engraving is a process that employs a focused beam of light to etch or mark metal surfaces without direct contact. This non-abrasive technique allows for intricate details and complex patterns to be engraved with extreme precision. The laser beam modifies the metal's surface, creating permanent marks that can withstand harsh conditions without fading or wearing off.
The engraving process involves directing a laser beam onto the metal surface, which absorbs the light and converts it to heat. This intense heat causes the metal to vaporize locally, creating a cavity that forms the design. The depth, size, and darkness of the engraving can be controlled by adjusting the laser's speed, power, and focus.
This technology is favored for its speed, accuracy, and flexibility, allowing users to quickly switch between different designs and materials without the need for tool changes. Additionally, since the process is digital, it can be fully automated with minimal human intervention, ensuring high repeatability and efficiency for production runs. Whether for individual projects or mass production, laser metal engraving offers a scalable solution to meet diverse needs.
Metal Laser Engraving vs. Laser Marking vs. Laser Etching
Understanding the differences between metal laser engraving, laser marking, and laser etching is crucial for selecting the right process for your specific needs. Although these techniques use similar laser technology, they differ significantly in their application, depth of mark, and the type of finish they produce on metal surfaces.
Laser Engraving
Laser engraving is a process where the laser beam physically removes the surface of the material to create a cavity that reveals an image at eye level. The laser creates high heat during the process, which essentially vaporizes the material, causing it to erode and leave a cavity. This method is particularly useful for applications requiring durability and depth, such as creating barcodes that withstand wear and environmental conditions or decorative designs intended to last the lifetime of the item.
Laser Marking
Laser marking is somewhat different in that it generally does not remove material but instead uses a low-powered beam to cause oxidation under the surface, turning the marked area black. It is also used to discolor the surface of the material, or to change its reflectivity and enhance contrast. Marks created by laser marking are typically superficial and do not wear away over time. This technique is ideal for serial numbers, labels, and safety warnings on tools and components, especially in industries like automotive and aerospace, where traceability and readability are critical.
Laser Etching
Laser etching is a subset of laser engraving, but generally involves melting the surface of the material instead of vaporizing it, creating a raised mark. It can be considered a middle ground between engraving and marking. The etching process increases the surface area of the mark, enhancing its visibility under certain lighting conditions. This technique is often used for applications such as branding logos on promotional items or creating slip-resistant surfaces on metal tools and parts.
| Feature | Laser Engraving | Laser Marking | Laser Etching |
|---|---|---|---|
| Process Description | Removes part of the metal to create a cavity | Changes the color of the metal, does not remove material | Melts the surface, creating a raised effect |
| Depth | Deep | Surface-level | Shallow to moderate |
| Durability | Very high (permanent) | High, does not wear off easily | Moderate to high |
| Common Uses | Barcodes, logos, decorative designs | Serial numbers, labels, safety warnings | Branding logos, slip-resistant textures |
| Material Impact | Significant material removal | Minimal to no material removal | Minor material modification |
| Visibility | High under most conditions | High contrast, especially on darker metals | Enhanced by raised, textured surface |
| Supported Metals | Almost all metals including stainless steel, aluminum, brass, copper | Primarily metals that can oxidize like steel and titanium; less effective on non-oxidizing metals | Most metals, especially those that can withstand moderate heat without warping |
What Metal Can Be Laser Engraved?
Laser engraving technology is versatile enough to work with a variety of metals, each offering unique properties and benefits for different applications. Here's a breakdown of some common metals that can be laser engraved:
Stainless Steel
Stainless steel is one of the most popular metals for laser engraving due to its durability and resistance to corrosion. It is ideal for creating high-contrast markings without any added ink or substance. This makes it perfect for industrial applications, such as marking tools, medical devices, and kitchenware with logos, serial numbers, and technical specifications.
Aluminum
Aluminum is a soft, lightweight metal that responds well to laser engraving. It can be engraved quickly and with high detail, making it suitable for electronics, promotional items, and personalized gifts. Aluminum can also be anodized to add color, which enhances the visibility and aesthetic appeal of the engravings.
Brass
Brass is a metal alloy made of copper and zinc, known for its bright, gold-like appearance. It is commonly used in decorative applications and is excellent for detailed engravings used in plaques, awards, and signage. The laser engraving process on brass produces sharp, clean contrasts that highlight intricate designs.
Copper
Copper is another metal that is highly conducive to laser engraving, though it is softer and more malleable than others. It is typically used for artistic applications and electrical components. Engraving on copper can create etchings that stand out due to the metal's natural color and sheen.
Titanium
Titanium is known for its strength, lightweight, and corrosion-resistant properties. It's often used in the aerospace, medical, and automotive industries. Laser engraving on titanium produces a subtle yet permanent mark, which is ideal for medical implants and automotive parts where permanence is critical.
Gold and Silver
Precious metals like gold and silver are also engravable with lasers. They are primarily used for jewelry and luxury items. The process allows for very fine, detailed, and delicate designs, which are perfect for custom jewelry pieces, watches, and commemorative items.
What is the Best Laser for Engraving Metal?
Choosing the right laser for metal engraving depends on the specific needs of the project, including the type of metal, the desired depth of the engraving, and the production volume. Here are some of the best types of lasers suited for engraving various metals:
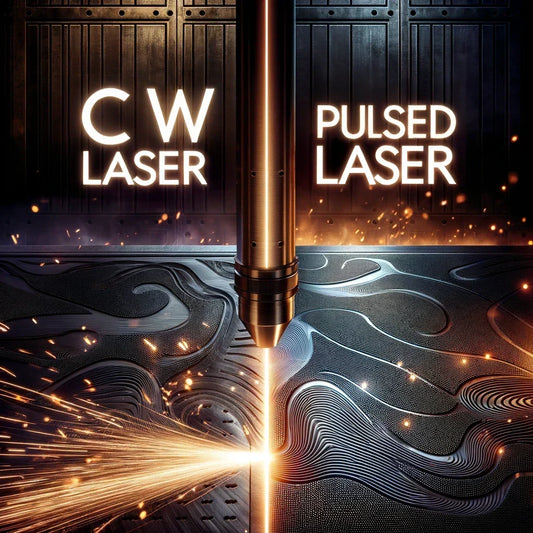
Fiber Lasers
Fiber lasers are particularly effective for metal engraving due to their high-intensity beam which is excellent at marking metals. These lasers operate with a wavelength that allows the energy to be absorbed effectively by metals, making them ideal for engraving stainless steel, aluminum, brass, copper, and titanium. Fiber lasers are known for their precision, speed, and long service life, making them suitable for industrial applications that require detailed, high-volume, and repetitive tasks.
CO2 Lasers
While CO2 lasers are primarily used for non-metal materials, they can be equipped with a metal marking solution to engrave on metal surfaces. This involves applying a marking compound to the metal, which the laser then engraves into. The result is a permanent mark that is fused into the surface. CO2 lasers with this capability are best used for less frequent metal marking tasks where the primary use of the laser is for other materials, offering flexibility for businesses that work with a variety of substrates.
Nd:YAG and Nd:YVO4 Lasers
Neodymium-doped Yttrium Aluminum Garnet (Nd:YAG) and Neodymium-doped Yttrium Orthovanadate (Nd:YVO4), known as Vanadate lasers, are solid-state lasers that are highly effective for both engraving and marking metals. These lasers produce a very fine spot size, making them excellent for applications requiring extremely fine detail, such as engraving intricate designs on precious metals like gold and silver. They offer a good balance between performance and cost, although they are generally more expensive than fiber lasers.
UV Lasers
UV lasers offer unique advantages for metal engraving, particularly when precision and minimal thermal effects are crucial. Operating at a very short wavelength, UV lasers are excellent for engraving highly reflective metals and delicate designs. They enable "cold processing," which reduces heat-induced damage to sensitive metals. While UV lasers are more expensive, they are ideal for applications requiring high-resolution engravings with minimal material stress.
Green Lasers
Green lasers operate at a wavelength which is highly absorbed by highly reflective metals, making them suitable for engraving copper, gold, and silver. These metals often reflect the wavelengths of more common infrared lasers like fiber and CO2, making green lasers a valuable tool for achieving high contrast and detailed engravings on these challenging materials.
Each type of laser has its specific advantages, so the best choice will depend on the metal type, the detail of the design, production needs, and budget considerations. Fiber lasers are typically the go-to for most industrial metal engraving tasks due to their efficiency and effectiveness across a wide range of metals.
How to Choose the Best Laser Engraving Machine for Metal?
Selecting the right laser engraving machine for metal is crucial for achieving optimal results in both quality and efficiency. Here is a checklist to help guide your decision-making process:
-
Determine Your Primary Use
- Type of Metal: Identify the types of metals you will primarily work with. Different lasers perform better on different metals.
- Engraving vs. Marking: Decide whether you need deep engraving capabilities or surface marking.
-
Assess the Laser Type
- Fiber Laser: Best for most metals and industrial applications.
- CO2 Laser with Marking Solution: Suitable for occasional metal engraving alongside other materials.
- Nd:YAG or Nd:YVO4 Lasers: Ideal for detailed work on precious metals.
- Green Laser: Necessary for highly reflective metals like copper and gold.
- UV Laser: UV lasers excel in applications requiring extremely fine detail and minimal thermal effects, such as electronic components and thin metals.
-
Consider Power and Speed
- Power (Wattage): Higher power lasers can engrave more deeply and quickly but may be more expensive. Assess the power needed based on the hardness and thickness of the metals you intend to engrave.
- Speed: Higher speeds are beneficial for production environments to maintain efficiency.
-
Look at Machine Size and Work Area
- Work Area: Ensure the machine's work area is sufficient for the size of the items you plan to engrave.
- Physical Size: Consider the physical space you have available for the machine in your workshop or facility.
-
Check Compatibility with Software
- Software Integration: The machine should be compatible with the design software you plan to use.
- User Interface: Look for an intuitive user interface that fits your workflow and skill level.
-
Evaluate Reliability and Support
- Manufacturer Reputation: Choose a machine from a reputable manufacturer known for quality and reliability.
- Technical Support: Ensure good customer service and availability of parts.
- Warranty: Check the warranty period and what it covers.
-
Consider Additional Features
- Rotary Attachments: For engraving cylindrical objects.
- Air Assist: Helps remove debris and heat from the cutting area to improve the quality of the engraving.
- Cooling Systems: Important for maintaining the laser's performance and longevity.
-
Set a Budget
- IInitial Cost vs. Operating Cost: Factor in not just the purchase price, but also the long-term operating costs including power consumption, maintenance, and consumables.
Using this checklist, you can systematically evaluate different laser engraving machines to find the best one that suits your specific needs in metal engraving. Remember to conduct thorough research and possibly seek demonstrations to ensure the machine meets your expectations.
What Additional Instruments or Accessories Are Needed To Laser Engrave Metal?
While the laser engraver itself is a powerful tool, having the right accessories and instruments can significantly enhance its capabilities and the quality of the final product. Here are some essential instruments and accessories that you should consider when setting up a laser engraving operation for metal:
Air Assist System
- Purpose: Helps in removing the excess heat and combustible gases from the cutting surface, which can improve the quality of the engraving and reduce the risk of burning the material.
- Benefit: Increases the lifespan of the laser lens by keeping it clean and cool.
Exhaust System
- Purpose: Extracts fumes and debris generated during the engraving process.
- Benefit: Maintains a clean work environment and prevents buildup on the machine and workpiece, which can affect the quality of the engraving.
Cooling System
- Purpose: Maintains the laser tube at an optimal temperature during operations.
- Benefit: Extends the life of the laser and ensures consistent performance.
Rotary Attachment
- Purpose: Allows the laser machine to engrave on cylindrical or round objects.
- Benefit: Expands the range of products you can work on, such as rings, bracelets, and cylindrical containers.
Focusing Lenses
- Purpose: Adjusts the focus of the laser beam for different thicknesses and types of materials.
- Benefit: Optimizes the quality and precision of engravings on various metal thicknesses.
Protective Eyewear
- Purpose: Protects eyes from the harmful laser light during operation.
- Benefit: Ensures safety during the use of the laser, which is crucial in preventing eye damage.
Marking Compounds (for CO2 lasers)
- Purpose: Applied to the metal surface before engraving with a CO2 laser to enable the laser to leave a mark.
- Benefit: Enhances the visibility and durability of marks made by CO2 lasers on metals.
Calibration Tools
- Purpose: Used to align and calibrate the laser for accurate engraving.
- Benefit: Ensures that the laser engravings are precise and consistent, minimizing errors and waste.
Software Upgrades
- Purpose: Provides advanced design and control features for the laser.
- Benefit: Enhances the capability to create complex and intricate designs with higher efficiency and accuracy.
Additionally, it's worth noting that some sellers, like Lasers Only, offer comprehensive packages that include most of these essential accessories along with the laser engraving machine. This can be a convenient option as it ensures compatibility and often provides better value than purchasing items separately. When shopping for a laser engraver, consider looking for these package deals to simplify the setup process and start your engraving projects with everything you need.
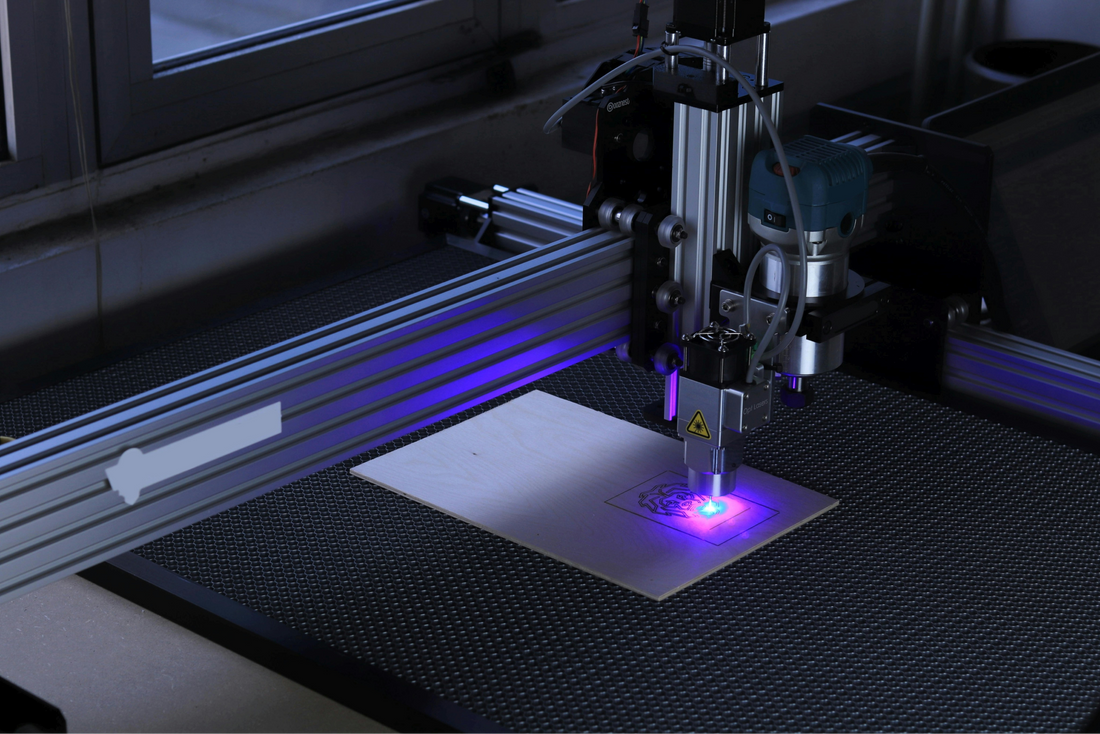
How to Laser Engrave Metal with a Fiber Laser Machine?
Using a fiber laser machine to engrave metal involves specific steps to ensure safety, precision, and quality. Here’s a detailed guide through the process:
1. Ensuring Safety
Start by prioritizing safety. Always wear protective eyewear designed to protect your eyes from laser light. Depending on your setup and the specifics of your machine, wearing gloves and a protective apron might also be necessary. Ensure that your workspace is well-ventilated, ideally with an exhaust system to remove harmful fumes produced during the engraving process.
2. Preparing Your Design
Begin with your artwork by either creating a new design or importing an existing one into a graphic design software that is compatible with your laser machine. Formats like AI, DXF, or SVG are commonly used. Adjust your design to suit the engraving process, taking into account the type of metal and the intricacies of the design to ensure it is appropriate for metal engraving.
3. Setting Up the Machine
Place the metal securely within the laser machine, ensuring it is perfectly flat to avoid any inconsistencies during engraving. Properly focus the laser by adjusting the distance between the laser and the metal surface, using the focusing tools provided with your machine. Correct focusing is crucial for achieving precise and clean engravings.
4. Configuring Machine Settings
Adjust the laser settings such as power, speed, and frequency based on the metal type and desired depth of the engraving. It’s advisable to perform a small test on a similar material to fine-tune these settings before you proceed with the actual project.
5. Starting the Engraving Process
Once everything is set up and tested, begin the engraving process. It is important to continuously monitor the operation to ensure everything runs smoothly. Keep the machine's lid closed during operation to maintain safety and prevent any interruptions to the laser process.
6. Cooling Down and Cleaning
After the engraving is complete, allow the metal and the machine some time to cool down if necessary before handling the engraved item. Clean the metal surface using a soft cloth and a suitable cleaning solution to remove any residues or debris. For deeper engravings, a small brush might be necessary to clean out the crevices.
7. Quality Check and Finishing Touches
Inspect the engraved item thoroughly to ensure that the engraving meets your quality standards and that all details have been accurately captured. Depending on the intended use, you might want to apply protective coatings or color fills to enhance the engraving’s visibility and durability.
8. Maintaining Your Machine
To ensure your machine continues to operate at peak efficiency, regularly clean the laser’s lenses and the work area. Also, periodically check and calibrate the alignment of the laser to ensure it remains precise for future projects.
How Do You Prevent Burn Marks When Laser Engraving?
Preventing burn marks when laser engraving, especially on sensitive materials like metal or wood, involves a few specific techniques to ensure clean results:
-
Correct Power Settings: Adjust the power settings of your laser to match the material you are engraving. Using too much power can easily lead to burn marks. Start with lower power settings and gradually increase as needed based on the material's reaction to the laser.
-
Air Assist: Use an air assist system which blows a stream of air directly at the point where the laser meets the material. This helps to remove heat and combustible gases from the surface, reducing the likelihood of burning.
-
Appropriate Speed: Increasing the speed of the laser can also help prevent burning. If the laser moves over the material more quickly, it reduces the amount of time heat is applied to any single point, thus minimizing the risk of burn marks.
-
Multiple Passes: Instead of trying to engrave deeply with a single pass, use multiple lighter passes. This approach allows for gradual removal of the material surface without excessive heat buildup.
-
Focusing the Laser Correctly: Ensure that the laser is properly focused. A laser that is out of focus can disperse energy over a wider area, which diminishes its effective intensity but can also cause unwanted heat dispersion leading to burns.
-
Test Engraving: Always perform a test engraving on a scrap piece of the same material. This allows you to fine-tune the power, speed, and focus settings without risking damage to the final piece.
-
Regular Maintenance: Keep your laser engraver clean and well-maintained. Buildup of debris and dirt can impact the machine's efficiency and increase the risk of burning, as the laser might not be operating at its optimal focus and alignment.
How Do You Darken Laser Engraving on Metal?
Darkening laser engravings on metal can enhance the contrast and visibility of your designs, making them more striking and easier to read. Here are some effective methods to achieve a darker engraving on metal:
-
Increase Laser Power: Adjusting the power settings of your laser can deepen the engraving, which naturally makes the mark appear darker. However, be cautious not to overdo it, as too much power can damage the material or distort the design.
-
Decrease Engraving Speed: Slowing down the speed at which the laser moves across the material allows the laser more time to heat the metal, which can darken the engraving. This needs to be balanced with the right power settings to avoid burning or damaging the material.
-
Multiple Passes: Running the laser over the same area multiple times can deepen and darken the engraving. This method is particularly useful if you want to enhance the darkness without adjusting the power too high.
-
Use Marking Solutions: For metals like stainless steel, applying a laser marking compound before engraving can significantly darken the resulting marks. These compounds create a chemical reaction with the laser’s heat to leave a permanent dark mark.
-
Chemical Oxidation: After engraving, applying oxidizing solutions such as liver of sulfur (for silver), or other patina solutions designed for specific metals can darken the engraved areas. This chemical treatment enhances the contrast between the engraved and non-engraved areas.
-
Annealing Instead of Engraving: For some metals, like stainless steel, you can use a laser annealing process, which heats the metal to create a color change without actually removing any material. This process can produce dark, permanent markings.
-
Post-Processing with Ink or Paint: Applying black ink or paint into the engraved sections is another method to darken engravings. Make sure to use a durable product designed for metal application, and clean the surface thoroughly before applying to ensure adherence.
How Deep Can You Laser Engrave Metal?
The depth to which you can laser engrave metal depends on several factors, including the type of laser engraver, the power of the laser, the type of metal, and the specific settings used during the engraving process. Here’s a general overview:
-
Type of Laser: Fiber lasers are typically used for metal engraving because they are well-suited for working with metals. They can achieve deeper engravings compared to CO2 lasers, which are generally used for softer materials like wood and plastic.
-
Laser Power: The power of the laser is a critical factor. Higher power lasers can engrave deeper into the metal. Laser power is usually measured in watts, and commercial laser engravers can range from around 20 watts to over 500 watts.
-
Type of Metal: Softer metals like aluminum can be engraved more deeply and easily compared to harder metals like stainless steel or titanium. The metal’s properties will determine how it absorbs the laser’s energy, which influences the achievable depth.
-
Speed and Frequency Settings: Slower engraving speeds and higher frequency settings can allow the laser to make deeper marks, as the laser spends more time in one area, increasing the amount of material that is vaporized.
-
Number of Passes: Multiple passes over the same area can deepen an engraving. Each pass removes additional material from the surface.
Typically, laser engraving depths on metal can range from about 0.02 mm to 0.5 mm. For industrial applications, where deeper engravings are needed for part identification or tooling, the depth might reach up to 0.5 mm or slightly more. For decorative purposes, shallower depths are often sufficient.
If deeper engravings are necessary, techniques like CNC milling might be more appropriate, as lasers have practical limits on the depth they can achieve without compromising the metal's structural integrity or the clarity of the engraving.
How Strong of a Laser to Engrave Metal?
To effectively engrave metal, a fiber laser ranging from 20 watts to 50 watts is typically sufficient for most applications, including personalizing jewelry and marking industrial parts. For deeper engravings or high-volume production, higher power lasers, starting from 50 watts and above, are recommended. Fiber lasers are especially popular for metal engraving due to their efficiency and versatility across various metals.
Should You Stain Before or After Laser Engraving
It's generally best to stain wood after laser engraving, rather than before. Here’s why:
-
Clarity and Precision: Engraving on unstained wood tends to provide cleaner and more precise results. The laser can more accurately cut and vaporize the natural wood without interference from the stain, which might affect how the laser interacts with the wood surface.
-
Absorption of Stain: Staining after engraving can enhance the contrast of the engraving itself. The engraved areas can absorb stain more deeply than the unengraved surfaces, highlighting the design and making it stand out more prominently.
-
Avoiding Burn Residue: Laser engraving can sometimes leave a residue of charred material, especially around the engraved areas. If the wood is stained before engraving, this residue can be more difficult to clean without affecting the stained surface. Staining after engraving allows for easier cleanup of these residues before the final staining process.
-
Adjusting Stain Application: Post-engraving staining gives you more control over the final appearance. You can choose to apply a heavier coat of stain to the engraved areas to darken them further, or use a lighter coat for a more subtle effect, depending on the desired visual contrast.
Overall, engraving first and then staining is the recommended approach for achieving the best visual results and maintaining the quality of both the engraving and the wood finish.
How Do You Smooth Metal After Engraving?
Smoothing metal after engraving can enhance the finish and remove any burrs or rough edges that may have been left by the engraving process. Here are some effective methods to achieve a smooth finish on engraved metal:
-
Sanding: Use fine-grit sandpaper to gently sand the engraved area. This can help smooth out any roughness and polish the surface. For small or intricate engravings, you might use a sanding pen or a Dremel tool with a sanding attachment for more precise control.
-
Steel Wool or Scotch-Brite Pads: For a less abrasive method than sanding, steel wool or Scotch-Brite pads can be used to smooth and polish the surface of the metal. These materials are especially good for achieving a uniform finish and are less likely to remove too much material.
-
Polishing Compounds: After sanding, apply a metal polishing compound to enhance the shine and further smooth the surface. Polishing compounds can be applied manually with a soft cloth or with a rotary tool equipped with a polishing wheel.
-
Buffing: Use a buffing wheel or a handheld buffer to finish the smoothing process. Buffing wheels can be used with various polishing agents to achieve a high-gloss finish, especially on softer metals like aluminum or brass.
-
Chemical Polishing: Some metals can be chemically polished using solutions that smooth and brighten the surface without the need for physical abrasion. This method is useful for delicate or intricate engravings where mechanical polishing might be too harsh.
-
Deburring Tools: If the engraving has left sharp edges or burrs, a deburring tool can be used to remove these imperfections. Deburring tools come in various sizes and are designed to neatly shear off unwanted metal edges.
-
Ultrasonic Cleaning: For removing microscopic debris and polishing residue, ultrasonic cleaners can be very effective, especially in professional settings. These devices use high-frequency sound waves in a cleaning solution to clean and polish metal surfaces thoroughly.
Choosing the right combination of these methods depends on the type of metal, the depth and detail of the engraving, and the desired finish. It's often beneficial to experiment on a small, inconspicuous area or a sample piece to determine the best approach for your specific project.
How Do I Make My Metal Engraving More Visible?
Making your metal engraving more visible involves enhancing the contrast between the engraved areas and the surrounding metal. Here are some effective techniques to achieve this:
-
Color Filling: One of the most straightforward ways to enhance visibility is by filling the engraved areas with color. Use a durable paint or a specialized engraving filler to apply color into the grooves of the engraving. This not only makes the design stand out but also adds a protective layer against environmental factors.
-
Oxidizing or Patina Solutions: Applying an oxidizing solution or patina specifically designed for metals can change the color of the engraved areas, providing a stark contrast. For example, using liver of sulfur on silver can produce a range of colors from golden to black, enhancing the visibility of engravings.
-
Polishing the Surface: Polishing the non-engraved areas while leaving the engraved sections untouched can create a shine that contrasts with the matte finish of the engravings. This method is particularly effective on reflective metals like aluminum and stainless steel.
-
Using a Darkening Solution: For metals like stainless steel, a darkening solution can be applied after engraving to deepen the color of the engraved lines. This is particularly useful for barcodes and QR codes where visibility is critical.
-
Depth of Engraving: Increasing the depth of the engraving can also improve visibility, especially in certain lighting conditions. Deeper engravings create shadows within the grooves, which can make them more discernible.
-
Directional Lighting: Sometimes, simply changing the lighting angle can enhance the visibility of an engraving. Directional light can create shadows in the engraved areas, highlighting the details more effectively.
-
Contrast with Surface Finish: If the surrounding surface is matte, a polished or glossier finish in the engraved areas (or vice versa) can enhance visibility. Adjusting the finish of the surrounding metal can make the engraved designs pop out more distinctly.
Each of these methods has its advantages and suitability depending on the type of metal and the intended use of the engraved item. Combining several techniques may yield the best results, especially for intricate designs or for items that are used in varying environmental conditions.
What's the Best Laser Engraver for Beginners?

For beginners looking to start with metal engraving, a 50W MOPA fiber laser is an excellent choice. It offers a good balance of power for engraving and marking various materials, including metals, and allows for color marking on stainless steel. This type of laser provides ease of use with user-friendly software, making it ideal for those new to laser engraving.
Can You Cut Sheet Metal With a Laser Engraver?
Cutting sheet metal with a laser engraver depends on the type and power of the laser being used. Most typical laser engravers, especially those designed for hobbyists or light commercial use, are not powerful enough to cut through metal. These machines are generally intended for engraving or marking surfaces.
However, higher-powered laser cutters, specifically those using fiber lasers, can indeed cut sheet metal. Fiber lasers are capable of cutting through various metals, including steel, stainless steel, aluminum, and brass, among others. The thickness of metal that these lasers can cut effectively depends on the power of the laser:
- Low-power fiber lasers (around 500 to 1000 watts) can cut thin sheets of metal, typically up to around 5 mm thick.
- High-power fiber lasers (1000 watts and higher) can handle thicker metal sheets, often up to 20 mm or more, depending on the exact power and the type of metal.
For cutting sheet metal, the laser cutter uses a high-intensity focused beam to melt the metal in a precise location, and a high-pressure assist gas, such as oxygen or nitrogen, to blow away the molten material and create a cut.
Do Laser Engravers Use a Lot of Electricity?
The electricity consumption of laser engravers varies depending on the type and size of the machine. Generally, laser engravers can be categorized by their power usage based on their laser type and power rating.
-
Small Desktop Laser Engravers: These typically use CO2 lasers with power ratings from about 30w to 100 watts. These machines usually operate on standard household electrical circuits and can consume between 500 to 1500 watts during operation, similar to a medium to large household appliance.
-
Industrial Laser Engravers: These machines, which may use fiber or higher-powered CO2 lasers ranging from 150 watts to several kilowatts, require more substantial power. For example, a 150-watt CO2 laser might consume around 3000 watts, while a 500-watt fiber laser could use 10,000 watts or more. These types of lasers often need dedicated power sources or adaptations to standard electrical setups due to their higher consumption.
-
Peak vs. Average Consumption: It’s important to note that lasers do not always operate at maximum power. The actual energy consumption will vary based on the material being processed and the specific operations performed (cutting vs. engraving). For engraving, lasers often use less power compared to cutting.
-
Additional Components: Other components of the laser engraver, such as cooling systems, exhaust fans, and computer controllers, also contribute to overall electricity use. For instance, water chillers for cooling the laser can add to the power demand, especially in larger systems.
In practical terms, while laser engravers do consume electricity, the cost can be relatively moderate for smaller models used in craft or small business settings. However, for larger industrial models, the energy costs can be significant and should be considered when evaluating operating expenses.
Can You Fix the Engraving Mistake on Metal?
Fixing an engraving mistake on metal can be challenging, but there are a few techniques that might help mitigate or correct the error, depending on its nature and severity:
-
Polishing Out the Error: If the engraving is shallow, it might be possible to polish the metal surface to remove the unwanted engraving. This involves using a high-grit sandpaper or a metal polishing tool to gradually wear down the metal surface until the engraving is less noticeable or completely removed. This is more feasible with softer metals.
-
Re-Engraving: If there's enough material and the design allows for it, you can re-engrave the area. This involves deepening the existing engraving or expanding the design to incorporate or cover up the mistake.
-
Adding Fill: For some designs, adding a colored fill to the engraved area can help mask imperfections. This can redirect attention and make the error less noticeable.
-
Using a Chemical or Mechanical Process: For certain types of errors, you might be able to use chemical etching to modify the affected area, or employ additional mechanical processes like milling to remove and refinish the surface.
-
Creative Modification: Sometimes, you can turn an error into a feature by modifying the design. This requires creativity and flexibility but can result in a unique and intentional-looking final product.
-
Professional Refinishing: For valuable or critical items, it might be worth consulting a professional metalworker or engraver. They can offer solutions like welding to add material or suggest more advanced refinishing techniques.
How Long Does Engraved Metal Last?
Engraved metal is extremely durable, with the longevity of the engraving typically lasting for decades or even centuries. The durability depends on factors such as the type of metal, the depth of the engraving, the environment in which it is used, and how it is maintained. Metals like stainless steel and titanium are especially resistant to corrosion and wear, making them ideal for both indoor and outdoor applications.
How Much Does a Good Laser Engraver Cost?

The cost of a good laser engraver can vary widely based on factors such as the type of laser, power output, build quality, and additional features. Generally, for a reliable and capable laser engraver suitable for both personal and professional use, prices start from around $4,000.
This starting price typically gets you into the range of entry-level professional machines with decent build quality and enough power to handle a variety of materials, including wood, acrylic, and basic metal marking with the appropriate settings. More advanced features, such as higher laser power, larger work areas, and the ability to cut or engrave more robust materials like thicker metals or stone, can significantly increase the cost.
For higher-end, industrial-grade laser engravers, especially those equipped with powerful fiber lasers for deep metal cutting and engraving, prices can easily climb to $20,000 or more. These machines are typically intended for heavy, continuous use in a commercial or industrial setting and offer faster speeds, greater precision, and longer lifespans.
The investment in a laser engraver should be matched with your specific needs and the expected volume of work, as these factors will help justify the cost relative to the machine's capabilities and the quality of the output.