Wood Laser Engraving: Tips, Tricks and FAQs

In this guide we will delve into the essentials of laser wood engraving. Topics covered will include the workings of laser engraving, choosing the appropriate wood, preparation techniques, and achieving desired artistic outcomes. Whether you're considering investing in a fiber laser machine for your business or are simply intrigued by the process, this guide aims to equip you with the necessary knowledge and tips to embark on your laser engraving journey. Step into the world of laser engraving on wood, where precision meets creativity, and discover how to transform simple wood pieces into remarkable works of art.
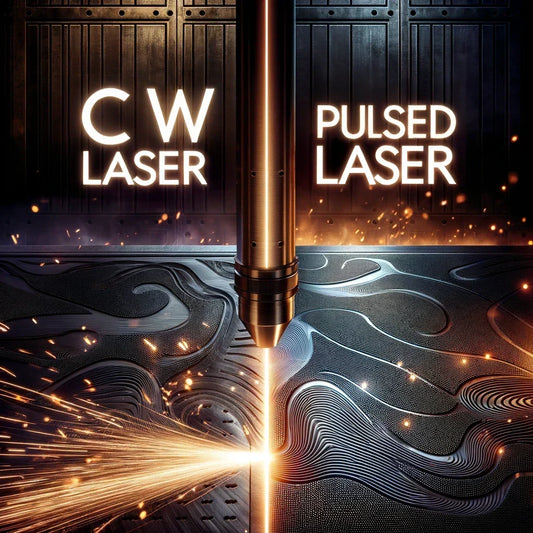
How does Laser Wood Engraving Work?

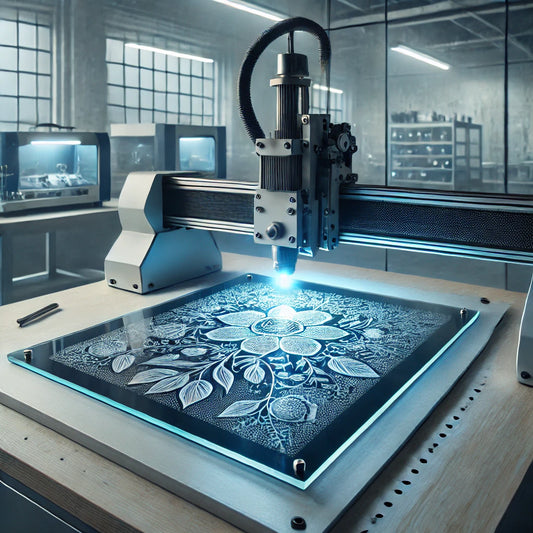
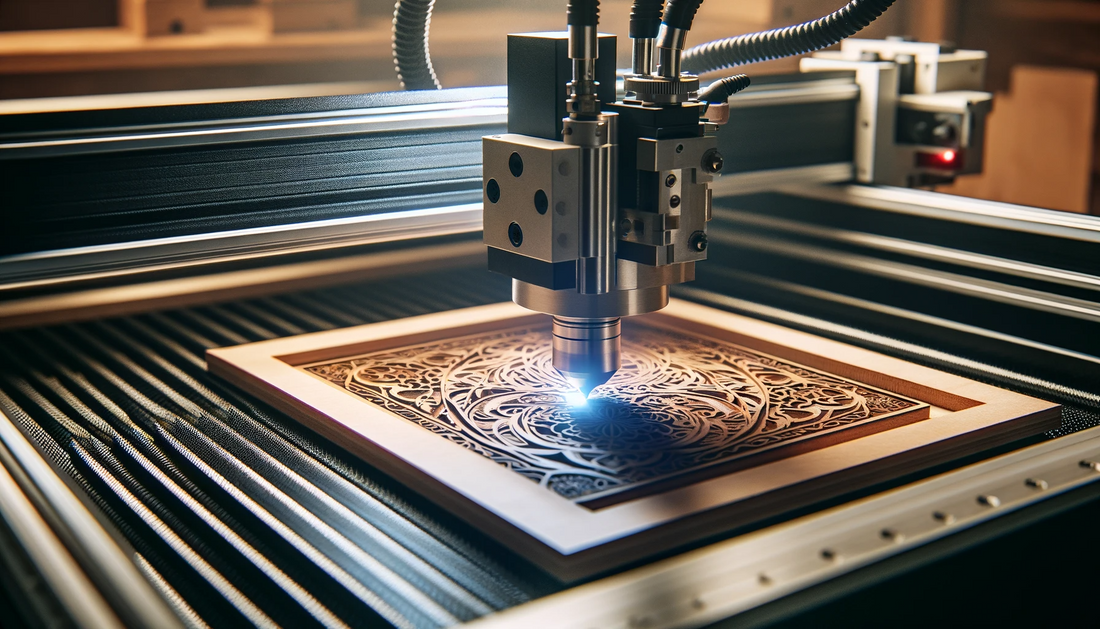
Laser wood engraving is a process that harnesses the power of a laser to create precise and detailed designs on the surface of wood. At the heart of this process is a laser engraving machine, which directs a concentrated beam of light to carve out designs. The laser essentially burns the wood, vaporizing the material where it touches, which results in a recessed area in the wood that forms the design.
The operation begins with a digital design, created in a software program specialized for laser engraving. This design can range from simple text to intricate graphics. The software translates this design into a digital format that the laser engraving machine can interpret. Once the design is ready and the wood is properly placed in the machine, the engraving process can begin.
The laser head, guided by the machine's software, moves over the wood's surface, focusing the laser beam on specific coordinates as per the design. The intensity of the laser, its speed, and the focus are crucial factors that determine the depth and quality of the engraving. When the laser beam touches the wood, it burns and vaporizes the surface layers of the material, leaving an etched mark. The depth of the engraving depends on several factors, including the type of wood, the power of the laser, and the length of time the laser is focused on an area.
This process is highly precise, allowing for detailed and intricate designs that would be challenging to replicate by hand. Unlike mechanical engraving methods, laser engraving does not involve any direct contact with the wood, which eliminates the risk of physical damage or wear to the material. Moreover, the versatility of the laser allows for varying depths and textures in the engraving, providing a wide range of artistic possibilities.
In essence, laser wood engraving is a fusion of technology and artistry. It allows for high precision and intricate detail in woodworking, transforming a simple piece of wood into a finely crafted work of art. With the right equipment and design, laser engraving can produce stunning results that are both aesthetically pleasing and highly detailed.
How Fast is Laser Engraving on Wood?
The speed of laser engraving on wood varies based on several factors, including the type of laser engraver being used, the complexity of the design, and the type of wood. Typically, laser engravers are classified by their power output, usually measured in watts. Higher-wattage machines can operate faster as they can burn or vaporize the wood more quickly.
For a simple design, such as basic text or a small logo, a laser engraver can complete the task in a matter of minutes. For instance, a small, straightforward design might take anywhere from 1 to 10 minutes to engrave. This speed makes laser engraving exceptionally efficient for producing personalized items or small batches of products.
However, when it comes to more complex or highly detailed designs, the engraving process takes longer. The laser must move more slowly to capture detailed designs accurately, which increases the overall time. For example, a large, intricate pattern could take an hour or more to complete.
The type of wood also impacts engraving speed. Softer woods like pine or cedar require less energy to burn and can be engraved faster. In contrast, harder woods like oak or walnut need more time under the laser to achieve the same depth of engraving.
Additionally, the desired depth of the engraving can affect speed. A shallow engraving requires less time compared to a deeper engrave, which needs multiple passes of the laser over the same area to achieve greater depth.
In conclusion, while the speed of laser engraving on wood can vary widely, it generally remains a quick and efficient process, particularly for less complex designs and softer wood types. For more intricate or deep engravings, the process takes longer due to the need for greater precision and multiple passes.
What is the Best Wood for Laser Engraving?
Selecting the right type of wood is crucial for achieving optimal results in laser engraving. Different woods react differently to the laser engraving process, affecting the quality, appearance, and ease of engraving. The best woods for laser engraving are those that are smooth, have minimal grain contrast, and respond well to the laser's heat. Below is a table showcasing some of the best woods for laser engraving, along with their specific characteristics that make them ideal for this purpose.
| Wood Type | Characteristics | Why It's Ideal for Engraving |
|---|---|---|
| Basswood | Soft, even grain; minimal resin content | Easy to engrave; produces a smooth finish |
| Birch | Fine grain; light color; good strength | Offers high contrast; handles detail well |
| Cherry | Smooth texture; rich color that deepens over time | Provides a luxurious look; high contrast |
| Maple | Light color; smooth grain; consistent texture | Excellent for detailed work; clear results |
| Alder | Soft with a light color; subtle grain | Easy to work with; ideal for photo engraving |
| Walnut | Rich dark color; straight grain | High contrast; elegant and premium feel |
| Plywood | Engineered wood; smooth surface; consistent throughout | Uniform quality; cost-effective for bulk |
| Poplar | Soft; lighter color; relatively inexpensive | Easy to engrave; suitable for paint filling |
These woods are favored in laser engraving due to their ability to produce clear, crisp engravings with a high level of detail. Factors such as grain pattern, wood hardness, and natural color play a significant role in determining how well the wood will respond to the laser engraving process. Choosing the right wood can greatly enhance the final appearance and quality of the engraved piece.
How to Seal the Wood Before Laser Engraving?

Sealing wood before laser engraving is an important step to enhance the quality and durability of the final product. Sealing helps to protect the wood from burn marks and resin seepage, ensuring a cleaner and more professional finish. Here is a step-by-step guide on how to effectively seal wood before laser engraving:
- Choose the Right Sealant: Select a sealant appropriate for the type of wood and the desired outcome. Clear sealants are typically preferred as they don't alter the wood's natural color and grain. Water-based sealants are often recommended because they are less likely to produce fumes during the engraving process.
- Prepare the Wood Surface: Ensure that the wood is clean and free from dust, oils, or any debris. Sand the surface lightly if necessary to achieve a smooth texture. This preparation is crucial for the sealant to adhere properly and evenly.
- Apply the Sealant: Using a brush or a clean cloth, apply a thin, even layer of the sealant on the wood surface. It's important to cover the entire area that will be engraved, but avoid applying it too thickly, as this could affect the engraving process.
- Allow it to Dry: Let the sealant dry completely. The drying time can vary depending on the type of sealant used and environmental factors like humidity and temperature. Refer to the sealant’s instructions for specific drying times.
- Sand Again if Necessary: Once the sealant is dry, lightly sand the surface again if you notice any raised grains or unevenness. This ensures a smooth and even surface for engraving.
- Clean the Surface: After sanding, wipe the wood surface with a clean, dry cloth to remove any dust or particles. This leaves a clean, sealed surface ready for laser engraving.
- Test Engrave (Optional): If you're using a new type of sealant or working with a new wood type, consider doing a small test engrave. This can help you gauge if the sealant affects the engraving quality and make adjustments if necessary.
By sealing the wood, you enhance the quality of the laser engraving, prevent burn marks, and ensure a more controlled and clean engraving process. This step is especially important for projects where precision and aesthetic are key, such as in custom artwork or high-quality decorative items.
How to Color Laser Engraving on Wood?
Coloring laser-engraved wood can add a vibrant and unique touch to any piece. Here's a step-by-step guide on how to effectively add color to laser-engraved areas:
- Choose the Right Colors: Select suitable paints or dyes for the wood. Acrylic paints, wood stains, and dyes are commonly used due to their ease of application and durability. Choose colors that contrast well with the natural color of the wood for better visibility.
- Prepare the Engraved Wood: Ensure that the wood surface is clean and free of dust or debris. If necessary, lightly sand the surface around the engraved area to ensure that the paint or dye adheres well.
- Apply the Color: Using a small brush, carefully apply the paint or dye to the engraved areas. For intricate designs, you might need to use a finer brush or a needle-tipped applicator for precision. Avoid applying too much paint or dye at once, as it can overflow onto non-engraved areas.
- Wipe Off Excess Color: If any paint or dye gets on the non-engraved areas, quickly wipe it off with a clean, damp cloth. This step should be done promptly to prevent the color from drying on unintended areas.
- Allow It to Dry: Let the colored engraving dry completely. The drying time can vary based on the type of paint or dye used. Refer to the product's instructions for specific drying times.
- Apply a Sealant (Optional): Once the paint or dye is dry, you can apply a clear sealant over the entire wood surface. This step is optional but recommended, as it helps protect both the wood and the colored engraving, enhancing its durability.
- Second Coat (If Needed): If the color appears too light or uneven, you can apply a second coat once the first one is dry. Ensure that each layer is completely dry before applying the next to maintain clarity and prevent smudging.
Coloring laser engravings on wood is an excellent way to bring your designs to life. With careful application and the right choice of colors, you can transform a simple engraving into a vivid and eye-catching piece.
How to Make Laser Engraving Darker on Wood
Achieving a darker engraving on wood can significantly enhance the contrast and visibility of the design. Here are some effective methods to darken laser engravings on wood:
- Adjust Laser Settings: Increase the power of the laser and decrease the speed. Higher power allows the laser to burn the wood more deeply, resulting in a darker engraving. However, be cautious not to burn the wood excessively, which could lead to unwanted charring.
- Multiple Passes: Run the laser engraver over the same area multiple times. This technique deepens the engraving, making it appear darker. Ensure that the laser is precisely aligned for each pass to avoid blurring or offsetting the design.
- Choose the Right Wood: Some woods naturally produce darker engravings. Woods with higher resin content, like cherry or walnut, tend to darken more when engraved compared to lighter woods like birch or maple.
- Apply a Pre-Engraving Stain: Staining the wood before engraving can lead to a darker finish. Choose a darker stain to enhance the contrast. Remember to allow the stain to dry completely before starting the engraving process.
- Use a Wood Filler: After engraving, apply a wood filler or a colored wax into the engraved areas. Choose a filler that is darker than the wood's natural color. Once the filler is dry, sand off any excess to reveal a clean, darkened engraving.
- Chemical Darkening Agents: Apply chemical agents, such as a diluted solution of potassium permanganate, to the engraved area. These chemicals react with the wood to naturally darken the engraved sections. Test this method on a small area first, as it can produce varying results depending on the wood type.
- Post-Engraving Paint or Ink: For a highly controlled and uniform darkening, use acrylic paint or ink over the engraved area. This method is particularly useful for achieving a very dark or even black engraving. Apply carefully and wipe off any excess from the non-engraved surfaces.
Each of these methods has its own advantages and can be chosen based on the desired effect, the type of wood, and the intricacy of the engraving. Experimenting with a small sample first is always advisable to ensure the best outcome for your specific project.
How to Clean Wood After Laser Engraving?

Cleaning the wood after laser engraving is essential to remove any residue and enhance the clarity of the design. Here’s how to properly clean wood post-engraving:
- Remove Surface Residue: Start by gently brushing off any loose debris from the surface using a soft brush or a piece of cloth. This step removes the superficial dust and charred particles created during the engraving process.
- Use a Damp Cloth: For more persistent residue, lightly dampen a soft cloth with water and gently wipe the engraved area. Be cautious not to soak the wood, as excessive moisture can warp or damage it. This method is effective for lifting light soot and smoke stains.
- Apply a Mild Cleaning Solution: If water alone is insufficient, mix a mild, wood-safe cleaning solution with water. Dampen a cloth with this mixture and gently clean the engraved area. Solutions like diluted dish soap or a specialized wood cleaner can be used, but avoid harsh chemicals that could damage the wood.
- Dry the Wood Thoroughly: After cleaning, make sure to dry the wood completely. Use a dry, soft cloth to blot any excess moisture. Allow the wood to air dry if needed, ensuring that it is completely moisture-free before any further processing or sealing.
- Sand Lightly if Necessary: For tougher stains or burn marks, lightly sand the area with fine-grit sandpaper. Sanding should be done with care, focusing only on the stained areas to avoid altering the overall appearance of the engraving.
- Final Wipe Down: After sanding, wipe the area again with a clean, dry cloth to remove any sanding dust and to ensure a clean, smooth finish.
- Condition the Wood (Optional): Applying a wood conditioner or oil can help restore the natural luster of the wood after cleaning. This step is optional but can enhance the appearance and protect the wood in the long run.
Cleaning the wood after laser engraving is a crucial step in ensuring a crisp and professional-looking finish. By following these steps, you can maintain the integrity and beauty of the engraved wood.
How to Get Rid of Char After Laser Engraving Wood?

Charred residue is a common byproduct of the laser engraving process on wood. While some charring can add depth and character to the engraving, excessive char may detract from the overall appearance. Here are effective methods to remove unwanted char:
- Light Sanding: Start with light sanding using fine-grit sandpaper. Gently sand over the charred areas, taking care not to erase or diminish the engraved design. This method is particularly effective for light to moderate charring.
- Use a Soft Brush or Cloth: For less severe charring, simply brushing the area with a soft brush or wiping it with a dry cloth can remove loose char particles.
- Damp Cloth Method: If the char is slightly stubborn, a damp cloth can be used. Lightly moisten a cloth and gently rub over the charred areas. Be cautious not to saturate the wood to avoid warping or damage.
- Cleaning Solutions: In cases of heavier charring, a diluted cleaning solution can help. Mix a mild detergent with water and apply it to the charred area with a soft cloth. This method can help loosen and lift the charred residue without harming the wood.
- Chemical Char Removers: Specialized char removal products are available that are designed to remove charring without damaging the wood. These should be used according to the manufacturer's instructions and tested on a small area first.
- Erase Gently: For fine detailing, using a pencil eraser can be effective. Gently rub the eraser over the charred areas. This method offers good control and is useful for small, detailed engravings.
- Final Clean-Up: After removing the char, give the wood a final clean-up. Wipe it with a clean, dry cloth to remove any residue from the cleaning process.
- Seal the Wood (Optional): After cleaning, consider sealing the wood. This can help protect the engraving and the wood, and also prevent future charring if additional work is done.
Removing char from laser-engraved wood requires a careful balance between cleaning the charred areas and preserving the intricate details of the engraving. These methods offer a range of options for effectively achieving a clean, refined finish.
What Software to Use for Wood Laser Pictures Engraving?
Choosing the right software is crucial for achieving high-quality results in wood laser pictures engraving. The software not only converts your designs into a format readable by the laser machine but also allows you to control the engraving process. Here are some recommended software options for wood laser picture engraving:
| Software | Description | Suitability |
|---|---|---|
| Adobe Illustrator | Vector graphics software known for precise control over design elements. | Ideal for detailed designs and complex artwork. |
| CorelDRAW | User-friendly interface with versatile design tools. | Good for both beginners and professionals. |
| Inkscape | Free, open-source vector graphics editor. | Suitable for hobbyists and small businesses on a budget. |
| LaserGRBL | Free software specifically designed for laser engraving. | Compatible with most laser engraving machines, good for picture engraving. |
| LightBurn | Laser-specific software with an intuitive interface and robust features. | Supports a wide range of laser engravers, offers advanced control settings. |
| AutoCAD | Advanced CAD tools for precision and technicality. | More suitable for professionals needing detailed, accurate designs. |
| GIMP | Free raster graphics editor useful for editing photos and images. | Valuable for preparing and enhancing images before engraving. |
How to Create Illustrations for Laser Engraving on Wood?
Creating illustrations for laser engraving on wood involves a blend of artistic design and technical understanding of both the medium and the engraving process. Here's a step-by-step guide on how to craft effective illustrations for this purpose:
- Choose the Right Design Software: Start by selecting a design software that you are comfortable with and is suitable for laser engraving, such as Adobe Illustrator, CorelDRAW, or Inkscape. These programs allow for the creation of precise vector graphics, which are ideal for laser engraving.
- Understand the Wood's Characteristics: Before designing, consider the type of wood you'll be engraving on. Different woods have varying textures and tones, which can affect how your illustration will look once engraved. Lighter woods, like birch or maple, can make fine details more visible, while darker woods, like walnut, offer a rich backdrop for your designs.
- Create or Import Your Design: You can either create a design from scratch or import an existing image into your chosen software. If you're creating a design, use the vector tools in the software to draw your illustration. If you're importing, ensure the image is high resolution and adjust it to a suitable size and format for engraving.
- Simplify and Adapt the Design: Laser engraving requires clear, well-defined lines for the best results. Simplify your design to its essential elements, removing any overly complex details that might not translate well to engraving. Convert your design to black and white (or grayscale if your engraver supports it), as this will help you visualize how the laser will interpret the design on wood.
- Adjust for Contrast and Depth: Increase the contrast in your design to ensure that the engraved illustration stands out against the wood. Consider the depth of engraving as well; deeper engravings are generally more visible but take longer to execute and can be more prone to charring.
- Preview and Refine Your Design: Many engraving software programs offer a preview feature. Use this to see how your design will look once engraved. Make any necessary adjustments to line thickness, detail, and contrast based on this preview.
- Test Engrave on a Scrap Piece: Before engraving your final piece, do a test run on a scrap piece of the same wood. This allows you to see how the actual engraving will look and make any last-minute adjustments to the design or the laser settings.
By following these steps, you can create compelling and engraving-friendly illustrations that will yield beautiful results on wood. Remember, the key to successful laser engraving is a combination of thoughtful design, understanding of the material, and careful preparation of the artwork.
Conclusion
Embarking on the journey of laser engraving on wood opens up a world of artistic possibilities. From understanding the basics of how laser engraving works to mastering the nuances of selecting the right wood, preparing surfaces, and creating stunning illustrations, this guide has aimed to equip you with the essential knowledge to begin your laser engraving endeavors.