The Ultimate Laser Glass Engraving Guide: Techniques, Tips, and Top Machines for Perfect Results

Laser glass engraving is an innovative and precise technique that allows for the creation of intricate designs, patterns, and text on glass surfaces. Whether you're a DIY enthusiast looking to add a personalized touch to your home projects or a CNC specialist seeking to expand your repertoire of skills, laser engraving on glass offers a unique blend of artistry and technology. This method uses focused laser beams to etch designs directly onto the glass, resulting in clean, detailed, and permanent marks that can transform ordinary glass objects into extraordinary pieces of art.
The popularity of laser glass engraving has surged in recent years, driven by the accessibility of laser engraving machines and the growing interest in custom, one-of-a-kind creations. For DIY enthusiasts, it offers a way to personalize everything from glassware and mirrors to decorative panels and awards. CNC specialists, on the other hand, appreciate the precision and efficiency that laser engraving brings to their work, allowing them to achieve professional-grade results with minimal effort. This guide will walk you through the essential aspects of laser glass engraving, ensuring that you have the knowledge and confidence to tackle your next project.
In this comprehensive guide, we'll explore the step-by-step process of laser glass engraving, including how to set up your machine and select the right materials. We'll delve into the differences between laser engraving and laser etching on glass, helping you choose the right technique for your specific needs. Additionally, we'll discuss the advantages of laser engraving, offer tips for achieving the best results, and highlight some of the top applications for this versatile method. You'll also find expert recommendations on the best laser engraving machines for glass, along with answers to common questions such as how to remove laser engravings from glass and what to apply to the glass before engraving. By the end of this guide, you'll be well-equipped to create stunning laser-engraved glass pieces that reflect your creativity and skill.
What is Laser Glass Engraving?
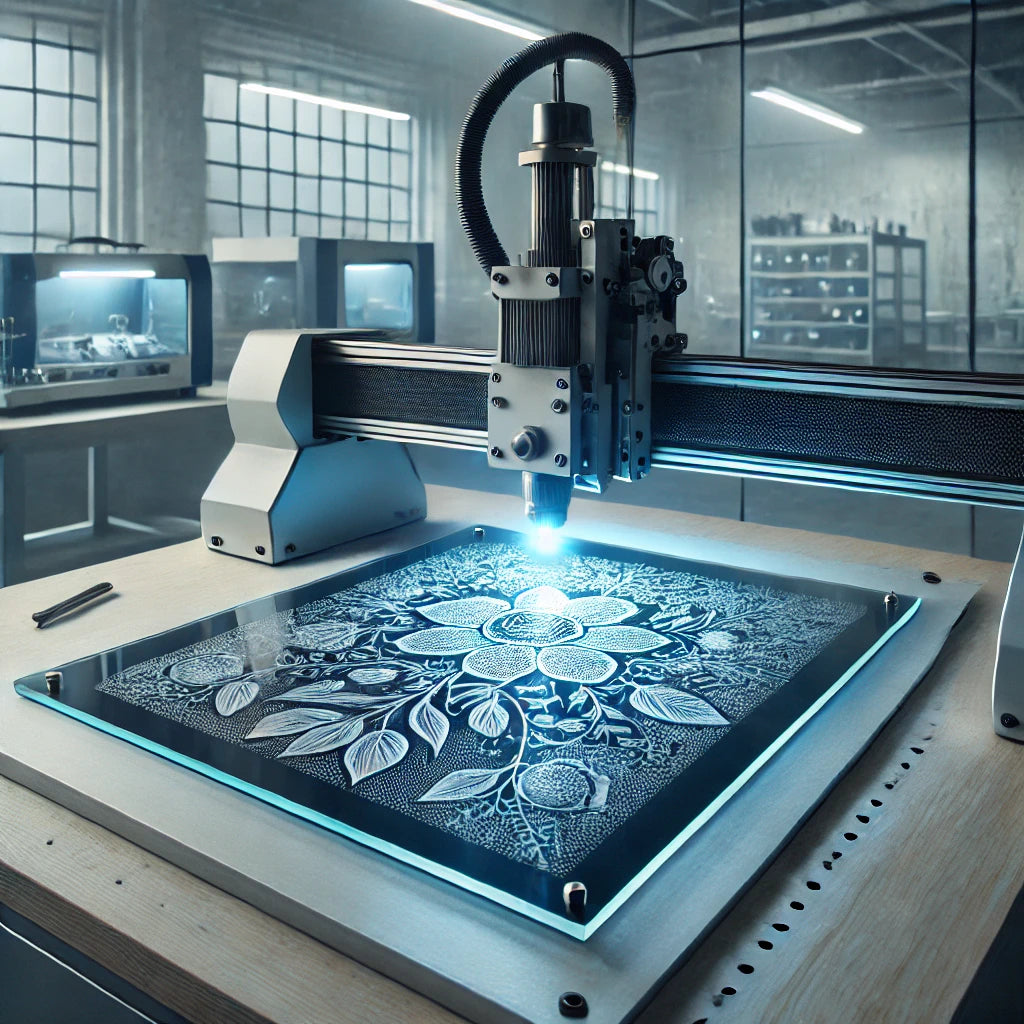
Laser glass engraving is a highly precise and controlled process that uses focused laser beams to create permanent designs, patterns, or text on the surface of glass. This method is renowned for its ability to produce intricate details and clean edges, making it a popular choice for everything from personalized gifts to industrial applications. The process involves directing a laser beam onto the glass surface, where it interacts with the material to create micro-fractures or remove tiny amounts of the surface layer, resulting in an engraved design that is both durable and visually striking.
Detailed Explanation of the Laser Glass Engraving Process
At the core of laser glass engraving is the interaction between the laser beam and the glass material. When the laser beam, which is a concentrated stream of light energy, comes into contact with the glass, it heats the surface to a point where micro-fractures occur. These fractures create the engraved pattern or design, with the depth and intensity of the engraving being controlled by the power, speed, and frequency settings of the laser.
The laser engraving process can be broken down into several stages:
-
Design Creation: The first step involves creating the design or text that you want to engrave. This is typically done using graphic design software, where you can manipulate images, fonts, and vectors to create a custom design. The design is then converted into a format compatible with the laser engraving machine, such as a vector file.
-
Laser Setup: Once the design is ready, the next step is to configure the laser engraving machine. This involves selecting the appropriate settings, such as laser power, speed, and resolution, based on the type of glass and the desired outcome. These settings determine how deeply the laser will engrave and how quickly the process will occur.
-
Material Placement: The glass object to be engraved is then placed on the engraving bed of the machine. It is crucial to ensure that the glass is positioned correctly and securely, as any movement during engraving can result in a misaligned or flawed design.
-
Engraving Process: With the glass in place and the settings configured, the laser engraving machine is activated. The laser beam follows the path of the design, systematically engraving it onto the glass surface. Depending on the complexity and size of the design, this process can take anywhere from a few minutes to several hours.
-
Finishing Touches: After the engraving is complete, the glass is carefully removed from the machine. Any residual dust or debris from the engraving process is cleaned off, revealing the final design. In some cases, additional steps such as polishing or coating may be applied to enhance the appearance or durability of the engraving.
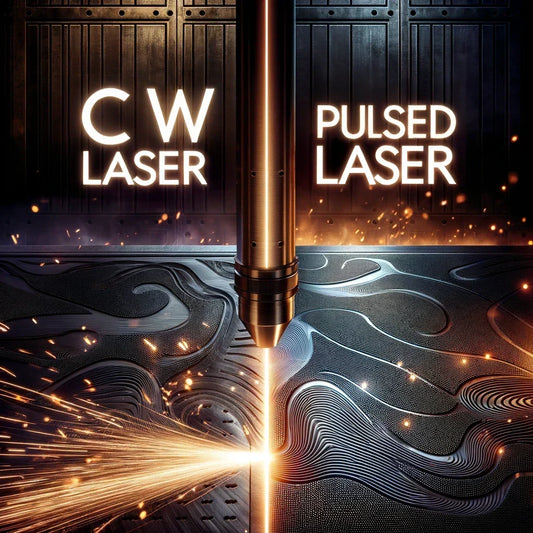
How Different Types of Lasers are Used for Glass Engraving
There are several types of lasers that can be used for glass engraving, each with its own set of characteristics and advantages. The two most commonly used types are CO2 lasers and fiber lasers.
CO2 Lasers
CO2 lasers are the most widely used for glass engraving. They operate at a wavelength of 10.6 micrometers, which is highly effective for interacting with glass surfaces. CO2 lasers are capable of producing high-quality engravings with smooth edges and fine details. They are also versatile and can be used on a variety of other materials, such as wood, plastic, and acrylic.
Fiber Lasers
Fiber lasers, on the other hand, operate at a much shorter wavelength, typically around 1.06 micrometers. While they are less commonly used for glass, they can be effective for engraving certain types of glass, particularly when higher precision or speed is required. Fiber lasers are generally more expensive and are more commonly used in industrial settings where specific engraving needs demand their unique capabilities.
Step-by-Step Guide to Setting Up a Laser Engraving Machine for Glass
Setting up a laser engraving machine for glass involves several critical steps to ensure that the process runs smoothly and produces the desired results.
-
Select the Appropriate Machine and Laser Type:
Choose a laser engraving machine that is suitable for glass. For most DIY projects and general use, a CO2 laser is the preferred choice. Make sure the machine has sufficient power, typically around 40-60 watts for effective glass engraving. -
Prepare the Design:
Use graphic design software to create or import your design. Ensure that the design is in a compatible format, such as .AI, .SVG, or .DXF. Adjust the design for size and resolution according to the specifications of your laser engraving machine. -
Configure the Machine Settings
Set the laser power, speed, and frequency according to the type of glass and the desired engraving depth. A common starting point for glass engraving with a CO2 laser is 20-30% power and a relatively high speed to avoid cracking the glass. -
Position the Glass:
Place the glass object on the engraving bed. Use jigs or clamps to secure the glass and prevent it from moving during the engraving process. Ensure that the surface to be engraved is level and aligned with the laser's focal point. -
Focus the Laser:
Adjust the focus of the laser to the exact height of the glass surface. Proper focus is crucial for achieving sharp and clean engravings. Some machines come with an autofocus feature, while others may require manual adjustment. -
Run a Test Engraving:
Before proceeding with the final engraving, run a test on a scrap piece of glass or a small section of the intended design. This allows you to fine-tune the settings and make any necessary adjustments. -
Start the Engraving Process:
Once everything is set up and the test engraving is satisfactory, begin the full engraving process. Monitor the machine during operation to ensure there are no issues, such as misalignment or overheating. -
Post-Engraving Care:
After the engraving is complete, carefully remove the glass from the machine. Clean the engraved area with a soft cloth to remove any dust or residue. If necessary, apply a protective coating or polish the engraved surface for a finished look.
By following these steps and understanding the nuances of laser glass engraving, you can achieve professional-quality results whether you're working on a DIY project or a specialized CNC application.
Laser Glass Engraving vs. Laser Glass Etching
Laser glass engraving and laser glass etching are two techniques often used to create designs on glass, but they differ significantly in their processes, results, and suitable applications. Understanding these differences is crucial for selecting the right method for your project, whether you're aiming for deep, permanent markings or more delicate, surface-level designs.
| Laser Glass Engraving | Laser Glass Etching | |
| Definition | Laser glass engraving is a process where a focused laser beam removes material from the glass surface, creating deep, permanent grooves or marks. The laser essentially carves into the glass, resulting in a tactile, indented design that is durable and long-lasting. | Laser glass etching, on the other hand, is a surface-level process where the laser beam lightly alters the surface of the glass without removing much material. This results in a frosted or matte appearance, with the etched design being less pronounced and more subtle compared to engraving. |
| Process | The laser beam is directed at the glass surface, where it heats and vaporizes tiny amounts of the material. This process creates a noticeable depth and texture in the engraved areas. The settings of the laser, such as power and speed, determine how deep and prominent the engraving will be. | During etching, the laser beam interacts with the surface of the glass, causing micro-abrasions or changes in the texture. The laser does not penetrate deeply into the glass, making etching a more delicate process that preserves the overall integrity of the glass structure. |
| Results | Produces deep, clearly defined designs that are visible from different angles and can be felt by touch. Engraving is ideal for creating bold, long-lasting images, text, or patterns on glass that need to stand out | Results in a more subtle, frosted appearance that is typically smoother to the touch. Etched designs are less pronounced and may not be as visible from all angles, making them ideal for a more refined or understated look. |
| Techniques | Requires higher laser power and slower speed settings to achieve the necessary depth. The process is more intensive and may require multiple passes of the laser to achieve the desired result. Engraving is suitable for thicker glass materials and projects that require durability. | Involves lower laser power and faster speed settings, as the goal is to create a light surface abrasion rather than deep grooves. Etching is typically faster and less demanding on the equipment. It is suitable for delicate or thin glass materials and projects where a softer touch is preferred. |
| Suitable Applications | Best suited for applications where durability and visibility are key, such as custom glassware, awards, signage, and decorative panels. Engraving is also preferred for projects that will be handled frequently or exposed to environmental elements, as the deeper marks are more resistant to wear and tear. | Ideal for creating intricate, detailed designs on glass surfaces that require a more subtle touch. Common applications include frosted glass windows, decorative glass accents, and personalized gifts where a refined, elegant look is desired. Etching is also popular in applications where the design needs to be visible without overwhelming the glass's overall appearance. |
Pros and Cons of Glass Engraving vs. Glass Etching
| Glass Engraving | Glass Etching | |
| Pros |
|
|
| Cons |
|
|
In summary, the choice between laser glass engraving and laser glass etching depends on the specific needs of your project. Engraving offers durability and boldness, making it perfect for high-impact applications, while etching provides a softer, more refined touch ideal for decorative or delicate designs. Understanding the strengths and limitations of each method will help you make the best choice for your creative endeavors.
Advantages of Laser Glass Engraving Methods
Laser glass engraving is a technique that offers a range of advantages, making it a preferred choice for both DIY enthusiasts and CNC specialists. This section will explore the key benefits of using laser engraving methods on glass, highlighting the precision, efficiency, durability, and environmental aspects that set it apart from other techniques.
Precision and Detail Achievable with Laser Engraving
One of the most significant advantages of laser glass engraving is the level of precision and detail it can achieve. The laser beam can be controlled with incredible accuracy, allowing for the creation of intricate designs, fine lines, and complex patterns that would be difficult or impossible to achieve with traditional engraving methods. This precision is particularly valuable when working on projects that require exact replication of detailed artwork or text, such as custom logos, intricate patterns, or personalized messages on glassware.
The ability to finely tune the laser settings—such as power, speed, and resolution—enables users to achieve the exact depth and sharpness required for their designs. This makes laser engraving ideal for applications where high-quality, detailed results are essential, whether it's for decorative purposes, branding, or functional items like measurement indicators on glass instruments.
Speed and Efficiency of the Process
Laser glass engraving is not only precise but also remarkably fast and efficient. Once the design is set and the machine is calibrated, the engraving process can be completed quickly, often in just a few minutes depending on the complexity and size of the design. This efficiency allows for the production of multiple pieces in a short amount of time, making laser engraving an excellent choice for both small-scale DIY projects and larger-scale commercial operations.
Compared to traditional engraving methods, which can be labor-intensive and time-consuming, laser engraving automates much of the process, reducing the need for manual intervention and minimizing the risk of human error. This increased efficiency translates into cost savings and faster turnaround times, making it a highly productive option for businesses and hobbyists alike.
Durability of Engraved Designs on Glass
The durability of the designs produced by laser glass engraving is another major advantage. Unlike surface-level techniques such as etching, which may wear off over time, laser engraving creates deeper grooves in the glass that are resistant to fading, chipping, or peeling. This durability ensures that the engraved designs remain intact and legible even with frequent use or exposure to environmental factors.
This long-lasting quality makes laser engraving particularly suitable for items that will be handled regularly or exposed to harsh conditions, such as custom glassware, signage, and industrial glass components. The permanence of laser-engraved designs also adds value to personalized items, making them ideal for gifts, awards, and commemorative pieces that are meant to be cherished for years to come.
Environmental and Material Benefits
Laser glass engraving is also an environmentally friendly method compared to many traditional engraving techniques. The process is non-contact, meaning that the laser interacts with the glass surface without the need for physical tools or chemicals, which reduces the production of waste and eliminates the need for potentially harmful materials.
Additionally, laser engraving does not require the use of consumables like inks, solvents, or abrasive materials, which are often associated with other engraving or marking methods. This not only reduces the environmental impact of the process but also lowers the overall cost of materials, making it a more sustainable and cost-effective option in the long run.
Furthermore, the precision of laser engraving allows for minimal material waste. Since the laser beam is highly controlled, there is little to no excess material removed beyond what is necessary to create the design. This efficiency not only conserves the glass material but also contributes to a cleaner and safer working environment, as there is less debris and dust generated during the process.
In conclusion, laser glass engraving offers a range of advantages that make it a superior choice for those looking to achieve high-quality, durable, and environmentally conscious results. Its precision, speed, durability, and sustainability make it an ideal method for a wide variety of applications, from intricate decorative designs to robust industrial markings.
Laser Engraving Glass Tips
Laser engraving on glass is a precise art that, when done correctly, can yield stunning, professional-quality results. However, achieving these results requires attention to detail, an understanding of the material, and careful adjustment of your laser engraving machine. In this section, we'll cover best practices for laser engraving glass, common mistakes to avoid, recommended settings for different types of glass, and tips for handling delicate or thin glass materials.
Best Practices for Achieving High-Quality Results with Laser Glass Engraving
-
Properly Clean the Glass Surface
Before engraving, ensure that the glass surface is completely clean and free of dust, oils, or fingerprints. Even small amounts of residue can affect the laser's effectiveness, leading to uneven engraving. Use a glass cleaner and a lint-free cloth to wipe down the surface. -
Use a Masking Material
Applying a thin layer of masking material, such as painter’s tape or a specialized laser engraving mask, can help protect the non-engraved areas of the glass from potential damage and reduce the occurrence of micro-fractures. This also aids in achieving sharper edges on the engraved design. -
Optimize Focus and Alignment
Accurate focus and alignment are crucial for achieving detailed and consistent engravings. Ensure that the laser beam is precisely focused on the glass surface and that the material is level. Using a focus tool or autofocus feature can help maintain the correct distance between the laser head and the glass. -
Engrave in Multiple Passes
For deeper engravings, it’s often better to perform multiple light passes rather than a single heavy pass. This reduces the risk of cracking the glass and allows for better control over the depth and clarity of the engraving. -
Test on a Scrap Piece
Before engraving your final piece, run a test on a scrap piece of similar glass. This allows you to fine-tune the settings and make adjustments to achieve the desired outcome without risking the final product.
Common Mistakes to Avoid while Engraving on the Glass
-
Overpowering the Laser
Using too much power can cause the glass to crack or shatter. It’s essential to start with lower power settings and gradually increase as needed. Overpowering also leads to excessive chipping and rough edges on the engraved design. -
Engraving Too Fast
Setting the engraving speed too high can result in shallow, inconsistent engravings that lack detail. While faster speeds may seem efficient, they often compromise the quality of the final product. A slower speed allows the laser to make more precise and effective cuts. -
Ignoring Material Variations
Not all glass is the same; variations in thickness, type, and composition can significantly affect the engraving process. Failing to adjust settings for different glass types can lead to suboptimal results. Always consider the specific characteristics of the glass you are working with. -
Skipping Maintenance
Regular maintenance of your laser engraving machine, such as cleaning the lens and ensuring proper ventilation, is critical. Neglecting these tasks can lead to poor performance and reduced engraving quality over time.
Recommendations on Settings for Different Types of Glass
Standard Glass (e.g., Window Glass, Float Glass)
Power: 15-30% (for a 40W CO2 laser)
Speed: 300-500 mm/s
Resolution: 300-500 DPI
These settings offer a balance between depth and speed, ensuring that standard glass is engraved without cracking or excessive chipping.
Tempered Glass
Power: Not recommended for engraving
Tempered glass is designed to shatter under stress rather than crack, making it unsuitable for laser engraving. Attempting to engrave tempered glass can result in the entire piece shattering.
Borosilicate Glass (e.g., Pyrex)
Power: 20-40%
Speed: 200-400 mm/s
Resolution: 300-400 DPI
Borosilicate glass is more resistant to thermal stress, making it suitable for slightly higher power settings. However, it’s still important to engrave in multiple passes to avoid thermal shock.
Lead Crystal Glass
Power: 10-20%
Speed: 400-600 mm/s
Resolution: 300-600 DPI
Lead crystal is softer than other types of glass and requires lower power to avoid fracturing. The higher resolution helps in capturing fine details.
How to Handle Delicate or Thin Glass Materials
-
Use a Supportive Backing:
When engraving thin or delicate glass, place a supportive material like a sheet of wood or acrylic underneath the glass. This helps absorb some of the laser energy and prevents the glass from breaking due to vibrations or uneven pressure. -
Lower the Power and Increase the Speed:
For thin glass, it’s important to use lower power settings and higher speeds to reduce the amount of energy absorbed by the glass. This minimizes the risk of cracking while still achieving a clear engraving. -
Avoid High-Contrast Designs:
Thin or delicate glass may not hold up well under high-contrast, deeply engraved designs. Opt for lighter, less intense designs that require less laser power and result in less stress on the material. -
Monitor the Engraving Process Closely:
Thin glass is more prone to damage during engraving, so it’s crucial to monitor the process carefully. If you notice any signs of cracking or excessive heat buildup, pause the operation and make necessary adjustments to the settings.
By following these tips and recommendations, you can achieve high-quality laser engravings on glass, regardless of the type or thickness of the material. Whether you’re working on a delicate piece or a robust glass item, understanding the nuances of the engraving process will help you avoid common pitfalls and produce stunning, professional results.
Top Applications of Laser Glass Engraving
Laser glass engraving is a versatile technique used across various industries for both decorative and functional purposes. Here are the main categories where this technology is most commonly applied:
-
Custom Gifts: Personalize glassware, picture frames, and commemorative plaques with names, dates, and intricate designs, making them unique and memorable gifts.
-
Awards and Recognition: Create elegant corporate awards, sports trophies, and recognition plaques with detailed engravings that reflect achievement and prestige.
-
Signage: Produce professional and durable glass signage for businesses, events, and properties, including business signs, door/window signs, and event signage.
-
Decorative Art and Home Decor: Design custom wall art, mirrors, and ornaments with laser-engraved patterns, quotes, or images to enhance home interiors.
-
Industrial and Technical Applications: Mark measurement instruments, product identification, and safety signs with precise, durable engravings that withstand industrial conditions.
These applications highlight the broad utility of laser glass engraving in creating customized, high-quality products across multiple sectors.
Choosing the Best Laser Glass Engraving Machine
Selecting the right laser engraving machine for glass can significantly impact the quality of your projects and your overall experience with the process. This section will guide you through the key features to consider, offer top recommendations based on different user needs, and compare popular models, highlighting their pros and cons.
Key Features to Look for in a Laser Engraving Machine for Glass
-
Laser Type and Power:
CO2 lasers are the most suitable for glass engraving, with power levels ranging from 30W to 100W or more. Higher power allows for faster engraving and the ability to work on thicker glass. Ensure the machine allows for precise control of laser power to avoid damaging delicate glass. -
Bed Size:
The engraving bed size determines the maximum dimensions of the glass pieces you can work with. Consider a larger bed if you plan to engrave bigger items like windows or large plaques. Look for machines with an adjustable bed height to accommodate glass items of varying thickness. -
Resolution and Precision:
High resolution (measured in DPI) is crucial for achieving fine details, especially in intricate designs or small text. Machines with a resolution of at least 300 DPI are recommended. Ensure the machine is built with high-quality components that maintain stability and precision during engraving. -
Ease of Use and Software Compatibility:
User-friendly interfaces and compatibility with popular design software (like Adobe Illustrator, CorelDRAW, or AutoCAD) can significantly streamline your workflow. Look for software that allows for easy image manipulation, layering, and previewing before engraving. -
Cooling System:
A good cooling system is essential for maintaining consistent performance and extending the lifespan of the machine, especially during long engraving sessions. -
Safety Features:
Safety features such as an emergency stop button, protective enclosures, and ventilation systems are important for safe operation, particularly in home or small workshop settings.
Frequently Asked Questions
How to Remove Laser Engraving from Glass?
Removing laser engraving from glass can be challenging, as the engraving is often etched deeply into the surface. However, there are methods you can try to minimize or remove the engraving. Here’s a step-by-step guide to help you through the process:
-
Assess the Engraving
Determine the depth and size of the engraving. Shallow engravings are easier to remove or reduce than deep, heavily etched designs. Consider if complete removal is necessary or if minimizing the engraving would be sufficient. -
Prepare the Glass Surface
Clean the glass thoroughly with a glass cleaner and a lint-free cloth to remove any dust, oils, or residues. This ensures that the removal process is more effective. -
Use a Glass Polishing Compound:
Apply a glass polishing compound to the engraved area. These compounds are designed to gradually wear down the surface of the glass, which can help reduce the visibility of shallow engravings.
Instructions:-
- Apply a small amount of polishing compound to the engraved area.
- Use a soft cloth or a buffing pad attached to a rotary tool to rub the compound into the glass in a circular motion.
- Continue polishing until you notice the engraving becoming less visible.
- Wipe away any excess compound with a clean cloth and assess the results. Repeat the process as needed.
-
-
Use a Dremel Tool with a Glass Polishing Attachment:
For more precise removal, you can use a Dremel tool with a glass polishing attachment. This method allows for targeted polishing, which can help minimize specific parts of the engraving.
Instructions:-
- Attach a glass polishing bit to your Dremel tool.
- Apply a small amount of glass polishing compound to the engraved area.
- Gently run the Dremel tool over the engraving in a controlled, circular motion.
- Periodically stop to check your progress and ensure you’re not over-polishing.
- Clean the area with a soft cloth and assess the results.
-
-
Consider Professional Refinishing:
If the engraving is deep or you’re unable to achieve satisfactory results with home methods, consider seeking professional help. Glass specialists can use advanced techniques like acid polishing or glass resurfacing to remove or reduce the engraving more effectively. -
Final Cleaning and Inspection:
Once you’ve finished the removal process, clean the glass thoroughly with glass cleaner and a soft cloth. Inspect the area to ensure that the engraving is sufficiently removed or minimized to your satisfaction.
Note: Complete removal of laser engraving from glass may not always be possible, especially if the engraving is deep. In such cases, you might consider re-engraving the area with a new design to cover the previous one or accepting the minimized appearance as the final result.
What Do You Put on Glass Before Laser Engraving?
When preparing glass for laser engraving, applying certain materials or coatings can significantly improve the quality of the engraving and protect the glass surface. These materials help to achieve cleaner lines, reduce the risk of cracking, and minimize chipping. Here’s an overview of the most commonly used materials and coatings, along with their benefits and when to use them:
-
Masking Tape or Painter’s Tape
Overview: Masking tape or painter’s tape is a simple yet effective way to prepare glass for engraving. The tape is applied directly to the area where the engraving will take place.
Benefits: The tape helps to reduce micro-fractures and chipping around the edges of the engraving by absorbing some of the laser’s heat and energy. It also prevents residue from the engraving process from sticking to the non-engraved areas of the glass.
When to Use: Use masking tape when working with delicate glass or when you need to ensure clean, sharp edges in your design. It’s particularly useful for intricate or detailed engravings. -
Dish Soap or Liquid Detergent
Overview: A thin layer of dish soap or liquid detergent can be applied to the glass surface before engraving. The soap acts as a barrier between the laser and the glass, which can help improve the engraving quality.
Benefits: This method helps to prevent the glass from overheating, which can reduce the risk of cracking or warping. The soap layer also helps to minimize dust and residue build-up during engraving.
When to Use: This technique is beneficial when engraving large, continuous areas or when working with thin glass that is prone to cracking under heat. It’s also useful for achieving a frosted effect in the engraved areas. -
Glass Engraving Spray or Coating
Overview: Specialized sprays or coatings are available that can be applied to the glass before engraving. These products are designed to enhance the engraving process by improving laser absorption and reducing reflection.
Benefits: These coatings help to achieve more consistent and deeper engravings by enhancing the laser’s interaction with the glass. They also reduce the risk of uneven engraving, which can occur due to the natural variations in glass density.
When to Use: Use these sprays or coatings when working with challenging glass types, such as tempered or thick glass, where achieving uniform engraving depth is critical. They are also ideal for complex designs that require precise and consistent results. -
Water
Overview: A thin layer of water can be applied to the glass surface before engraving, often in combination with masking tape or on its own. The water layer acts as a coolant during the engraving process.
Benefits: Water helps to dissipate heat generated by the laser, reducing the likelihood of thermal shock and cracking. It also aids in creating a smoother finish by minimizing the impact of laser energy on the glass surface.
When to Use: This method is particularly useful for engraving thin or delicate glass, where heat management is essential. It’s also a good option when working on large glass surfaces where consistent cooling is necessary.
Conclusion
Laser glass engraving is a versatile and powerful technique that allows both DIY enthusiasts and CNC specialists to create detailed, durable, and beautiful designs on a wide range of glass surfaces. By understanding the processes, tools, and materials involved, you can achieve professional-quality results that enhance everything from custom gifts and awards to industrial applications and home décor.
Throughout this guide, we’ve covered the essential aspects of laser glass engraving, from the differences between engraving and etching to the key features to look for in a laser engraving machine. We’ve also provided practical tips on how to prepare glass for engraving, how to choose the right machine, and how to tackle common challenges like removing engravings or working with delicate materials.
Whether you’re just starting out or looking to refine your skills, mastering the art of laser glass engraving opens up a world of creative possibilities. With the right knowledge, equipment, and techniques, you can transform ordinary glass into extraordinary pieces that stand the test of time. So, equip yourself with the right tools, follow the best practices, and start engraving your way to impressive, high-quality results.